What's Here

Wednesday, June 30, 2010

Some Details I Forgot

So I have gotten an enormous amount of emails from all the lovely bloggers out in the blogosphere who have had some questions about the Mod Podge Solar Lights -- and I wanted to post a little update to my instructions.  (You can also see the new information on my original post).

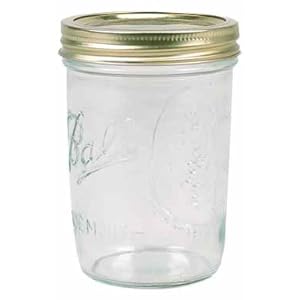
1.  What kind of jars did you use?

I used Ball Pint Sized Wide Mouth Canning Jars:


 I found mine at Menards for $7.00ish -- but if anyone lives by a Fleet Farm, I would try there too. 


2.  What kind of solar lights did you use?

This is kind of hard -- I bought these lights from Menards.  BUT - you don't have to do EXACTLY as I did -- you could use a bigger light and have it sitting on top of the jar -- just leave the plastic case thing on the light so it helps the light stay the jar:


3.  Where do you get outdoor Mod Podge?  

If YOU find out - let me know!  It's something you may have to order online -- I couldn't find it in any stores.  I know Joanne's website has it, but their store didn't.  So -- check around online -- you can probably get it cheaper than in the store too.  Oh - and sadly there are no Hobby Lobby's around me -- but I'm sure they have it.

Feel free to comment or email with any other questions -- I'll do my best to answer -- but I'm no expert!!


If anyone makes these lights -- let me know -- I'd love to show them off on here!


And thanks to Nikki at Nikki's Nifty Knacks (say that three times fast!!) - she featured these lights today -- AND she's having a Gettin' Crafty on Hump Day party -- so go check out all the fun crafty things people are submitting!!


Tuesday, June 29, 2010

Using up the Leftovers

So FIRST -- a few HUGE thank yous, to some WONDERFUL people out in the bloggy world.

Thank you so much to Mad in Crafts, who featured my solar lights -- hugs and thank yous to you!


And thank you, thank you to Sunny at Life In Rehab who has an awesome list of her top ten brand new bloggers -- and I was fortunate enough to be on it -- you are too sweet!


And my last "Thank You" today goes to ..... Remodelaholic.  I'm an obsessed dedicated reader of theirs and when I saw MY project on THEIR blog -- my jaw dropped to the floor.  Thanks so much Cassity for featuring my PB lamp -- I'm still speechless -- I'm sure this is how a 13 year old who just met Justin Bieber feels like.


 Enough of my gushing....

 Do you ever try to make a recipe that uses a bunch of ingredients you have left over from other meals?  Or you try to cook something using up a stock of something in your pantry?  Well I felt it was time to do that with my project left-overs.  Every now and then I think it's a good idea to go through all my "treasures" and try to use them up (or sadly sometimes toss them).  If I didn't do this I have a feeling I might end up on an episode of "Hoarders."

So do you remember these?  They're leftover from my colorful solar lights...and I had 12 of them:


 And do you remember this??  The glass part is what's left of the lamp I used for my Pottery Barn meets Mod Podge lamp:


 And in honor of our Country's Birthday around the corner -- I HAD to make it Independence Day themed.

So I got out all things red, white and blue and went to town creating.  First, I found some Glitter Mod Podge (oh yes, that's right, glitter PLUS Mod Podge -- and go to their website they have glow in the dark too!) for only $.99 at Joannes.  Oh, and on a side note -- I've been told I'm becoming borderline obsessed with this stuff - so I may have to tone down my Mod Podge projects before my fingers become permanently Mod Podged. : )

I took scrapbook paper leftover from another project I did and cut it into geometrical shapes.  Then I slathered on the Mod Podge and adhered it to my glass light case.


Then I took nine of my solar light things (twelve was going to be just too many) and I spray-painted three of them red, left three clear and ..... are you ready......Mod Podged three of them with blue food coloring.  (You can see my technique here and here).  This time I used my new Glitter Mod Podge.


I tied a knot in some twine and threaded it through the little hole in the bottom of my plastic solar light cases, so that they could hang upside down from the string:


Next I took my glass Mod-Podged light base and used more twine so I could hang that too.  I tied two pieces of twine to a washer and threaded that through the hole in the top:


So NOW, it's ready to attach our plastic solar light protectors -- just tie them onto a piece of twine around the bottom lip so they hang upside-down in the wind.


The Cost Breakdown:

TOTAL:  $FREE
Just a little way to use up some leftovers!

MuralMaker and More


Monday, June 28, 2010

A Blogging Award?!?!

I am honored to be recognized by Emily over at Decorchick! with the Versatile Blogger Award.   Isn't she sweet?  I LOVE following her blog and reading all her bubbly comments -- so THANK YOU Decorchick!


According to the terms of the award, I have to tell you seven random things about myself. Well, hmmmmm -- this may be harder than I thought.

1. I've lived in five houses my entire life and they're all within a 10 miles of where I live now.
2. In high school, I was voted "most likely to cry at graduation" (I'm not sure if that's good or bad).
3. I'm always disappointed when I pour my final cup of coffee for the morning.
4. I get to work with my mom and dad every day at our family business, Zell Plumbing.
5. I will never get tired of watching reruns of "Friends".
6. I love a seeing a basket of clean, folded laundry -- I almost don't want to put it away.
7. I met the love of my life in high school and he still makes me laugh every day.

And now I pass on the award to seven new blogs I have recently discovered.

1. Becca at One Girl, One Beautiful World
2. Brandi at Tales of a Domestic Goddess
3. Katie at On the Banks of Squaw Creek
4. Lisa at The Pursuit of Happiness
5. Christin at Pregnant with Powertools
6. Heather at The Traveling Thirfter
7. Elizabeth at Habitually Crafty


Happy Monday to everyone!
 

Early Happy Birthday to the USA!

I absolutely L-O-V-E the Fourth of July.  We have so much fun celebrating our Country's Birthday.  We're so lucky to get to see family and extended family and eat delicious summery foods, AND watch fireworks AND get a day off from house projects -- who could ask for more!?!   So since this is one of my favorite Holidays, you'd think I'd have some cute house decor to show it.  But, nope.  I have  not one stitch of 4th of July love to decorate my house with.  Sad, isn't it?  Let's fix that, shall we?

I started with two cheap-o frames I found at Goodwill this last weekend -- they were matching frames -- and for 2.00?  How could I have passed them up??(plus I actually kind of liked the saying on this one --  it convinced me to buy it)  So I removed everything, like the glass and picture.  Then I spray-painted each  frame - one red, and one blue.


I had found these super cute wooden stars at Joanne's -- and well, that's very patriotic too, don't you think?  So I spray-painted them red, blue and off white.  There -- the hard part of the project is already done! :)

I took some Independence Day Scrapbooking paper (which after I bought and cut up realized I had a ton of 4th of July themed paper in my stash -- oh well) and cut it down to the frame size.  I then put the back of the frame back on and got ready to attach my red, white and blue stars.


I took each of the little stars I painted and hot glued them together with a piece of twine in between.  I used different size and color combination to keep it interesting.

Next I attached a hook -- you know like a jewelry hook that goes into a wall or something?  I had spray-painted it black since we only had gold ones.  Then I hung the stars from the hook and began to strategically place my stars around the frame.  I glued them to the frame since I wanted them to stay put  -- but you could let them hand down if you wanted.

Finally I attached the frames together using some twine glued to the back of each.  I decided to hang it on my front door -- but it may move.  I haven't decided yet.


The Cost Breakdown:

Frames:  $1.99
Twine:  Had
Wooden Stars:  $2.49
Spraypaint:  Had
Hooks:  had
Scrapbook Paper:  $.59 x 2 = $1.18
TOTAL:  $5.66


Note -- If I had one of those heavenly Silhouettes I would have put "Welcome" on one of them -- but since my freehand is pretty scary I left them blank. :)

I'm linking this up to the CSI 4th of July Themed Challenge:


Also - a HUGE thank you to the gals behind Fireflies and Jellybeans for spotlighting my solar lights yesterday!  They have a wonderful blog that spotlights TONS of other crafty crafters.


Friday, June 25, 2010

Framed Letter Friday Reveal

A quick thank you to Lanie and her SUPER entertaining blog, Life in the Pitts, for featuring my little solar lights -- she's a crafty, yet really funny blogger, and you should definitely check her out.  Thanks, Lanie!!


We had some good guesses and a lot of right answers this week on the letters (sometimes the pics are just too obvious!)

Maria at You Craft Me Up was oh-so-close on the "E" (plus she totally gave me the idea to use a part from my chandelier in the future!)

Inspired by You guess was spot on this week on our "I" -- Woo Hoo!! :)  

Elizabeth at Habitually Crafty got the "wrought iron something" right for the "E" -- okay I couldn't resist -- it made me laugh!

Thanks for the guesses, Ladies -- and here's the answers


L:  Although it definitely looked like a photo frame, it was our railing for the stairs


I:  You guys guessed it!  It was a pull from a my recent lamp project.


V:  The Solar Light from the House Number Planter Box.


E:  Our "wrought iron something!"  It's a candle-hangy-thing that I don't really know what to do with -- I may be ditching it soon. Hmmmm.


All that to make up:


Framed Letter Friday

Okay, well just a few "thank yous" and wonderful blogs to mention before today's Framed Letters.

First, Rachelle at Fingerprints on the Fridge is having a "Feature Yourself Friday" today! You should check out all the wonderful projects people have submitted!  She was just a doll and featured my PB table lamp -- thank you, thank you, Rachelle!


Have you been to Mary's blog Lil Bit of Us?  Well today she was wonderful enough to feature my solar lights and my pottery barn light from last week.  Isn't she sweet??  She has tons of crafty fun things on her site too!  Thanks, Mary!


 Another AMAZING site is Amy's blog Mod Podge Rocks -- as you can tell I've been a little bit obsessive about my Mod Podge lately -- and this blog takes the cake on Mod Podge Projects.  Amy was also SUPER sweet and shared my solar light project with all her Facebook Friends -- so THANK YOU, Amy!


Now on to our Framed Letter Friday!  I honestly love doing this every week -- hopefully you all do to?  You're not getting bored with all these letters??  Are you ready for a lively bunch of letters this week??? (hmm, that was a lot of questions in a row)


Anyone want to guess what these letters are???  We'll do the reveal a little bit later on this afternoon..so until then!


Thursday, June 24, 2010

Caving In

With Father's Day just last weekend, we thought it'd be fun to show you some before and afters of our "Man Cave" room -- you know, the room that houses all the "Manly" items that you can't put in the rest of the house?

Ours has been a work in progress -- and we've been working on transforming it into a good mix of beauty and manliness (sometimes that's tough to do!).

This room is where we watch all our movies, where the hubby hangs out and where we spend a lot of time in the summer (it IS the coolest room in the house, after all!).  But before this was OUR hand-me-down man cave it was a work out/exercise room:


Right away before we moved in we painted the walls (they don't really look quite so bright) and had new carpet put in:


It already looks more "Manly", right?!?  It's stayed this way (plus furniture!) for the last two and half years -- until recently when we finally got around to redoing it a little more.

Our most exciting addition....some celebrities:

We splurged on some of Kevin's favorite classic (is Spaceballs really a classic!?!) movies.  We scoured Amazon for these and found them for about $10.00 a piece.

You can see more about my shelf here , the toy-chest makeover here, and more about the faux six panel doors here.

Now for the next project in this room -- have you seen these AWESOME shelves that Sandra at Sawdust and Paper Scraps built?  Oh, yes you read that right -- she built them.  They are GORGEOUS!  And how perfect would they be to hide all the ugly entertaining equipment?? We'll just tack that on to the never ending to do list!

Tuesday, June 22, 2010

Solar + Mod Podge = AMAZING

THIS POST IS SPONSORED BY:


When it's June in the Midwest you can only bet that we are outside -- whether it be work, play or relaxation -- you can find us soaking up the sun in the great outdoors.  And since we are spending so much time outside now -- we thought we should definitely invest in some solar lights for the front yard patio.  Have you shopped for these lately?!?  They are like $8.00 - $10.00 per light -- seriously!!  I have been browsing them for months now trying to find a good deal...but no luck so far.  So of course I turned to my trusty blogger friends for some ideas and inspiration......enter these two lovely ladies:

They both had WONDERFUL projects -- and I totally "borrowed" their fabulous ideas and created something new.  So go visit their blogs too and check out their projects:

Heather over at Our Life in a Click did some incredible solar light jars -- for only $6.00!

And at Pam's blog, Gingerbread & Snowflakes  she has a great tutorial on how to "tint" glass! Visit her tutorial -- it's awesome.  (I mentioned this last week on my PB knockoff table lamp).


Okay, are you ready for the project!?!

I picked up a box of wide mouth Mason jars (12 jars for $7.82).

And I already had my food coloring-Mod Podge technique down from  my last project like this.  But just for some additional instructions (you get better each time you do it!) -- here's how I did it:

Pour about a 1/4 cup of  Outdoor Mod Podge onto a plastic plate and add 5 - 7 drops (depending on how light or dark you want your color) of food coloring.  I used McCormick's Neon Food Coloring (except the yellow - which is from a plain old box of food coloring).  BTW - this was MORE than enough of the mixture to cover three glass jars.

Mix it together with a paint brush until it's completely blended.

Then paint it on!

Let it sit for a minute or two.

Take a paper towel and crumple it up.  Dip it into the Mod Podge mixture and stipple the jar until you get the desired look.

 
If anyone else is a "messy crafter" like I am -- here's a tip:  I took an old Crystal Light container and put the jar on top of it.  That way I could hold the end of the container while I kept my hands free and clear of the Mod Podge mixture that was being slathered on my jars.

And don't be frightened if your jars look like this initially:

 Hello Electric Green!  They do mellow out as they dry to look more like this:


Now that the jars are done -- time to add some light!

I picked up these little solar lights at Menards for $2.00 a piece (still wish I would have bought more!)


Then I took the post and clear plastic off -- leaving just the solar top and light.


These lights sit perfectly in the tops of the jars -- they are pretty snug, but hold the light up:


Next step is to wrap some wire around the lip of the jar to hang them from a hook.  I'm thinking you might able to use some sort of twine too?  Just a thought.

I wrapped my wire around a few times and hooked them around each other so that each side had an end of the wire.  Then I twirled them together in the middle to make a handle.  (Make sure your wire is wrapped really tight around the glass).


The last step is to hang them on a hook.  I searched high and low for some sort of shepherd's hook that didn't cost an arm and a leg.  I found these online, but I'm a "results-now" kind of girl -- so I didn't want to wait for them to shipped.    I did happen upon these 18" plant prop rods at Home Depot though.  And for $.74 a pop -- I took twelve!

Simply hook the wire around the loop and you're ready for some night-time light  from your colored jars!


Aren't they cute?  I'm in love with these!  But what's even better is the price:

MATERIALS:

12 pack of wide mouth jars:  $7.82
12 solar lights at $2.00 each:  $24.00
Wire:  Had
Mod Podge:  Had
Food Coloring:  Had
12 Plant Prop Rods at $.74 each:  $8.88

GRAND TOTAL:  $40.70 which means just $3.39 PER LIGHT

Not bad!

And how 'bout a peak at night?


(luckily my talented hubby knows how to take better pictures at night than I do!)

And today I'm linking up to these fun parties!


UPDATE:
 So I have gotten an enormous amount of emails from all the lovely bloggers out in the blogosphere who have had some questions about the Mod Podge Solar Lights -- and I wanted to post a little update to my instructions.

1.  What kind of jars did you use?


 I found mine at Menards for $7.00ish -- but if anyone lives by a Fleet Farm, I would try there too. 


2.  What kind of solar lights did you use?

This is kind of hard -- I bought these lights from Menards.  BUT - you don't have to do EXACTLY as I did -- you could use a bigger light and have it sitting on top of the jar -- just leave the plastic case thing on the light so it helps the light stay the jar:


3.  Where do you get outdoor Mod Podge?  

If YOU find out - let me know!  It's something you may have to order online -- I couldn't find it in any stores.  I know Joanne's website has it, but their store didn't.  So -- check around online -- you can probably get it cheaper than in the store too.  Oh - and sadly there are no Hobby Lobby's around me -- but I'm sure they have it.

Feel free to comment or email with any other questions -- I'll do my best to answer -- but I'm no expert!!

If anyone makes these lights -- let me know -- I'd love to show them off on here!