
When it's June in the Midwest you can only bet that we are outside -- whether it be work, play or relaxation -- you can find us soaking up the sun in the great outdoors. And since we are spending so much time outside now -- we thought we should definitely invest in some solar lights for the front yard patio. Have you shopped for these lately?!? They are like $8.00 - $10.00 per light -- seriously!! I have been browsing them for months now trying to find a good deal...but no luck so far. So of course I turned to my trusty blogger friends for some ideas and inspiration......enter these two lovely ladies:
They both had WONDERFUL projects -- and I totally "borrowed" their fabulous ideas and created something new. So go visit their blogs too and check out their projects:


And at Pam's blog, Gingerbread & Snowflakes she has a great tutorial on how to "tint" glass! Visit her tutorial -- it's awesome. (I mentioned this last week on my PB knockoff table lamp).
Okay, are you ready for the project!?!
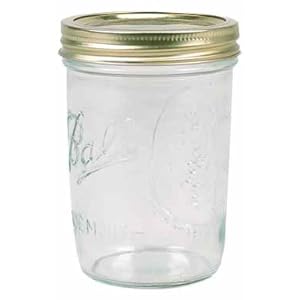
I picked up a box of wide mouth Mason jars (12 jars for $7.82).

Pour about a 1/4 cup of Outdoor Mod Podge onto a plastic plate and add 5 - 7 drops (depending on how light or dark you want your color) of food coloring. I used McCormick's Neon Food Coloring (except the yellow - which is from a plain old box of food coloring). BTW - this was MORE than enough of the mixture to cover three glass jars.

Then paint it on!
Let it sit for a minute or two.
Take a paper towel and crumple it up. Dip it into the Mod Podge mixture and stipple the jar until you get the desired look.

 If anyone else is a "messy crafter" like I am -- here's a tip: I took an old Crystal Light container and put the jar on top of it. That way I could hold the end of the container while I kept my hands free and clear of the Mod Podge mixture that was being slathered on my jars.
And don't be frightened if your jars look like this initially:
Hello Electric Green! They do mellow out as they dry to look more like this:


Now that the jars are done -- time to add some light!
I picked up these little solar lights at Menards for $2.00 a piece (still wish I would have bought more!)

Then I took the post and clear plastic off -- leaving just the solar top and light.


These lights sit perfectly in the tops of the jars -- they are pretty snug, but hold the light up:

Next step is to wrap some wire around the lip of the jar to hang them from a hook. I'm thinking you might able to use some sort of twine too? Just a thought.
I wrapped my wire around a few times and hooked them around each other so that each side had an end of the wire. Then I twirled them together in the middle to make a handle. (Make sure your wire is wrapped really tight around the glass).


Simply hook the wire around the loop and you're ready for some night-time light from your colored jars!


Aren't they cute? I'm in love with these! But what's even better is the price:
MATERIALS:
12 pack of wide mouth jars: $7.82
12 solar lights at $2.00 each: $24.00
Wire: Had
Mod Podge: Had
Food Coloring: Had
12 Plant Prop Rods at $.74 each: $8.88
Not bad!
And how 'bout a peak at night?


(luckily my talented hubby knows how to take better pictures at night than I do!)
And today I'm linking up to these fun parties!
UPDATE:
So I have gotten an enormous amount of emails from all the lovely bloggers out in the blogosphere who have had some questions about the Mod Podge Solar Lights -- and I wanted to post a little update to my instructions.
1. What kind of jars did you use?
I found mine at Menards for $7.00ish -- but if anyone lives by a Fleet Farm, I would try there too.
2. What kind of solar lights did you use?
This is kind of hard -- I bought these lights from Menards. BUT - you don't have to do EXACTLY as I did -- you could use a bigger light and have it sitting on top of the jar -- just leave the plastic case thing on the light so it helps the light stay the jar:

3. Where do you get outdoor Mod Podge?
If YOU find out - let me know! It's something you may have to order online -- I couldn't find it in any stores. I know Joanne's website has it, but their store didn't. So -- check around online -- you can probably get it cheaper than in the store too. Oh - and sadly there are no Hobby Lobby's around me -- but I'm sure they have it.
Feel free to comment or email with any other questions -- I'll do my best to answer -- but I'm no expert!!
If anyone makes these lights -- let me know -- I'd love to show them off on here!

I love your ideas....I just love them....can't wait to try this one!...still looking for a vase for my PB pendant light
ReplyDeleteI love these! So cute and inexpensive!
ReplyDeleteI did the same thing last weekend! This has got to be the biggest project in blogland this week, and just in time for summer. I LOVE your colors by the way.
ReplyDeleteOf course I don't mind you linking up with my blog!! Thanks for the shout out!! I love the use of colored jars. Now I may have to try out your idea!
ReplyDeleteheather
Wow! I hadn't seen anything like this before and I just love it! I bought a few of those solar lights too at $2 and stuck them in the ground. I like the star light pattern but that's all. I LOVE these! Off to craft store tonight for ModgePodge as I have everything else!
ReplyDeleteThanks for stopping b my Blog....I didn't actually change the trim up...but if you have any measuring skills at all (like my hubby) it's quite easy...also if you don't...see those squares at the corners of my windows? That's for people like me who don't ! Hope that helps...When I do find my hurrican vase..the pendant will hang in the bathroom!
ReplyDeleteVERY cool! I want to hang some from the bush near my patio!
ReplyDeleteBEAUTIFUL!
ReplyDeleteI especially love the colored glass!!
When I saw the first pictures with the modge podge and food coloring all over the jars, I thought it looked strange--LOL! But when it dried? WOWZA!
I am doing a project similar to this, with shepherd's hooks, tiny iron baskets and battery-operated flickering tealights...
I looked around a few of your posts--you are quite creative--so glad to meet you!
Blessings to you as you make your home!
~me
Hi! I found you over at Todays Creative blog and came by to invite you and your awesome solar lights to my garden Linky party that starts tomorrow! There will be some great projects and awesome giveaways! I hope you can join us!
ReplyDeleteSharon
http://keeninspirations.blogspot.com/2010/06/garden-party-update.html
What a GREAT idea!!!! I love the way they look. And, mason jars......they are so charming. :-)
ReplyDeleteHoly cow. Absolutely gorgeous. Great job.
ReplyDeleteWicked awesome. Your version of those lights is just incredible. Love it!
ReplyDeleteThe jars are gorgeous! Love the colors they turned out to be. I will be trying this. Thanks for the inst.
ReplyDeleteAlso, thanks for visiting me over at Pittypat Paperie. Drop by again anytime Ü
Your creativity made it fantastic. love it... and it gives me some more ideas.Thanks for sharing I love the green one more... beautiful.
ReplyDeletehttp://craftaworld.blogspot.com
check my new post
This is amazing! I love your lights, the colors are perfect!
ReplyDeleteThat is GENIUS!!!!!!!!!! LOVE IT! Thanks so much for linking up to gettin' crafty on hump day! :)
ReplyDeleteThose are beautiful and thanks for the tutorial, although I don't recognize the solar lights you used..This would be a great way to recycle some jars that 'stuff' like pasta sauce and salad dressing come in...I may try it if I can find some of those lights.
ReplyDeleteMama Bear
THis is awesome, so pretty, thanks for sharing
ReplyDeleteTHis is awesome, so pretty, thanks for sharing
ReplyDeleteTHis is awesome, so pretty, thanks for sharing
ReplyDeleteI love those lights. You are very creative!
ReplyDeleteLove the lights! I'm working on bringing some color to our entryway and these would be perfect!
ReplyDeleteThanks for visiting my blog. Now following!
Mary Ellen
Wow!! I envy you. You are SO crafty!! These are adorable. I would love to have some for our patio!!
ReplyDeleteSuch a cute and fun idea!! Love it!!
ReplyDeleteWhat a great idea! I think I will try red white and blue for my 4th celebration !Please come by and visit my post about our farm experience this past week when you can! Debbie
ReplyDeleteThese are AWESOME! And what's more wonderful than that---I live right next to a Menards! Score.
ReplyDeleteWhat a creative project -- I'm not sure how you came up with it, but I totally LOVE it! The colors are magnificent!
ReplyDeleteWow! Those are so cute! I'm going to add these to my list of things to make!
ReplyDeleteThanks for the visit & comments on my blog. WOW those lights turned out great! Add that to my Want To Do list! :)
ReplyDeleteWhat a great idea! I'm thinking I may have to do something like this to light our sidewalk at Halloween!
ReplyDeleteGet out!! That is just cool! And the night-time pictures turned out awesome! Wow. Very impressive, Amanda.
ReplyDeleteAnd yes, you can come right on over and play in our playroom.
Hey Amanda! Thanks for your comment, and by the way, I LOVE those solar lights! I think I will have to find a toddler proof version! To answer your question, that epoxy paint is super durable. It is washable and heat resistant. I haven't had any chips (and mine gets moved alot because I keep it in my pantry for more counter space) As long as you follow directions, you shouldn't have any problems!
ReplyDeleteBrilliant. Brilliant! Sharing with the Mod Podge Rocks Facebook group. . .
ReplyDeleteI totally love this idea!! I can see some other ideas with colored mod podge too!
ReplyDeleteAwesome post - I was just browsing for some light for our front lawn...I think these are the answer! The price is also amazing. Thanks so much for sharing!
ReplyDelete-diane
Beautiful!!!
ReplyDeleteOMGosh!! These are beautiful, I love the glow they give off at night. The pics are great and your tutorial was awesome. Thanks for sharing.
ReplyDeleteOk...I am LOVING these! GOOD thinking! Thanks for joining us for Anything Related #12! ~Bridgette
ReplyDeleteOooooohhhhh AWESOME! What luck to find these, I'm dis-enchanted with my solar lights. Plus if the area to be lit up isn't in the sun, they can be moved around! Super idea, I love finding stuff I've never seen before!
ReplyDeleteLove these!!! Great idea and very cute!!
ReplyDeleteCheck you out crafty lady! I love these and how stinkin' cute! Thanks for linking up to Hoo's got talent!
ReplyDeleteOh sooooooo CUTE! I love these and can't wait to copy your idea! My yard will look so darling. You are talented!
ReplyDeleteThese are beautiful. Thanks so much for posting what food coloring you used, the coloring on yours is my favorite! I am featuring this on my friday favorites http://www.lilbitofus.blogspot.com Sorry I don't have a direct link, but I'm scheduling it today to post for tomorrow and I wanted to know I was featuring this!
ReplyDeletethis is insane! I truly love this idea!
ReplyDeleteOMG! I love it! I'm so glad you stopped by and commented so I could find your awesome blog! Gonna have to follow! :)
ReplyDeletewhat a great idea!! i'm totally jealous! enjoy your lights!
ReplyDeleteWhoa, I had no idea that you could do that with mod podge and food coloring!! they turned out so good. and go you- that's a great price to pay for those fantastic lights!
ReplyDeleteThank you for participating in the Creative Therapy Session at Life in the Pitts.
i am obsessed! i already love mason jars, and i will need to make these immediately if not sooner. thanks so much for sharing your genius project!
ReplyDeleteThose are so stinkin cute!!!
ReplyDeleteLove, Love, Love these! I can't wait to make them. Thanks so much :))
ReplyDeleteWhat a great idea. Very creative and You have a great blog! I am your new follower. Come by and visit me at http://showememama.blogspot.com
ReplyDeleteThis is just awesome! What a great idea and they look so pretty!
ReplyDeleteI am so doing this tomorrow! Wonderful!
ReplyDeleteThis is totally AWESOME!
ReplyDeleteI just wanted to let you know that I featured your here:
http://firefliesandjellybeans.blogspot.com/2010/06/sunday-spotlight-soys-33-favorites.html
This is sooo clever. Love it.
ReplyDeleteThanks for linking up to the Mad Skills party!
ReplyDeletemadincrafts.blogspot.com
thanks for sharing this cool idea. I have some jars that i may have to try this with if i can find the lights. we need some for near the pool. how fun!
ReplyDeleteLove the jars! Thanks for sharing!
ReplyDeleteI just started blogging and I'm looking for followers. I was hoping you would stop by my blogpot and look around and maybe you will follow me too.I followed you !thanks, mimilovesall8@yahoo.com
mimilovesall8.blogspot.com
The photos you added are so good, I thought this was a completely different project when I saw it over at Hodgepodge!
ReplyDeleteThat is a fabulous idea!!! I love the colors too!
ReplyDeleteTotally awesome!!!! I will definitely be making some of these for myself! Thanks for sharing your very creative idea! :)
ReplyDeleteVery very cool! I am wondering how important it is to use outdoor modpodge. Can I use all purpose?
ReplyDeleteOh My Gosh! These are simply too adorable! I love them and I'm soooooo doing this! Love it!
ReplyDeleteGreat Idea. They are so cute!
ReplyDeleteLove this idea! Brilliant! Thanks for showing us how you did it on Modern Craftswoman Monday! Rory
ReplyDeleteOh my gush, I am so in love with your light and idea. I am the kind of person who is afraid to begin with a project but since I think I can do this by just a several trip to some stores I will try this one. Good luck for me and thanks!
ReplyDeleteHi Amanda -
ReplyDeleteI featured both of your projects today for my Fab Friday Favorites - feel free to grab my "I've been featured" button if you want.
Julie
Featuring this...come by and snag a button! ;)
ReplyDeletetoo cool!!!!
ReplyDeleteSo cute and adorable! You can almost see tinkerbell in one of the yellow ones ;-).
ReplyDeleteThese are great. Someday I'm going to make some. I'll add it to my list.
ReplyDeleteGreat idea & great tutorial!
ReplyDeleteI don't know where you are located, but I am in AZ and found the Outdoor Mod Podge at a Michael's Arts & Crafts store. I made my lanterns today with some Ball jars that are shaped a little differently. I love them! Thanks!
ReplyDeleteWowzers...these are simply fabulous!
ReplyDeleteI have NEVER seen such a clever use of jars. So very clever!
ReplyDeleteWhat a great idea. This allows you to get the best deal on the solar lights but get the exact look you want. Ingenious! Visiting from CSI.
ReplyDeleteOK, I am going to have to try this! They could be perfect for our backyard, DIY wedding!!!
ReplyDeleteI simply adore this project! I wish I had found this a few weeks earlier! My BF's daughter is getting married on the 24th and crafting supplies are slim in this small town! I'll take a chance at finding what I need at WalMart and the two dollar stores we have.
ReplyDeleteOf course, I will also have to make some for my daughter and her new home, and also for my BF's house that needs sprucing up. Hmmm.... my mother would love these too. I feel a HUGE crafting marathon coming on!
I wrote a blog about your project. You deserve some traffic headed your way! (Even though I am new to blogging and only have two followers! I know that is going to change soon with my recent fixation on blogging!)
And, it gives me an opportunity to archive the projects I love so that I can check my blog later on and remember what things I HAVE to make! I'm putting your button on my sidebar cause I see way too many cute ideas on your page!
Here is the link to your project I blogged about: HonestNiceWoman
What the? That's great! Thanks for the tutorial, too.
ReplyDeleteWhat the? That's great! Thanks for the tutorial, too.
ReplyDeleteHere is some that I made using your tutorial. Thanks!!
ReplyDeletehttp://happymomof3ramblings.blogspot.com/2010/07/july-4th-decorations-and-party-pics.html
Hi Amanda
ReplyDeleteI featured these on Craft Gossip :)
http://homeandgarden.craftgossip.com/mason-jar-solar-lights/
If you would like a "featured by" button, you can grab one here!
http://homeandgarden.craftgossip.com/grab-a-craft-gossip-button/
These are so awesome!
ReplyDeleteBrilliant idea! What a great way to have a unique, custom light to light up the yard.
ReplyDeleteEven if I never used your tutorial to make solar lights (which I intend to do), it would have enormous value for having shown me what a BEAUTIFUL finish you can get with tinted Mod Podge. That is gorgeous! I have been very Mod Podge-y of late (I am also entered in this week's CSI challenge) and am constantly looking for new ways to use it. Thanks for sharing a beautiful project. Feel free to check out my blog, if you like. I will definitely be watching yours!
ReplyDeleteGorgeous!
ReplyDeleteSimply gorgeous!!
Merhaba..ben de yapmak istiyorum bunlardan ama kavanozları neyle boyadığınızı anlamadım.Bana yardımcı olursanız sevinirim.sevgiler..
ReplyDeleteI used the gel food coloring and it makes it not as clear I think, but we found very similar lights at home depot and our lanterns are going to be used around our pool deck this summer! Thanks for the tutorial! The lights are so pretty!
ReplyDeleteI used the gel food coloring and it makes it not as clear I think, but we found very similar lights at home depot and our lanterns are going to be used around our pool deck this summer! Thanks for the tutorial! The lights are so pretty!
ReplyDeleteA work mate recommended me to this website. Thnx for the details.
ReplyDeleteFeel free to surf my weblog Picture Booth Adelaide
Sounds like a great idea. I will definitely give it a try. Thanks for sharing
ReplyDeleteSounds like a great idea. I will definitely give it a try. Thanks for sharing
ReplyDelete