THIS POST IS SPONSORED BY:
When it's June in the Midwest you can only bet that we are outside -- whether it be work, play or relaxation -- you can find us soaking up the sun in the great outdoors. And since we are spending so much time outside now -- we thought we should definitely invest in some solar lights for the front yard patio. Have you shopped for these lately?!? They are like $8.00 - $10.00 per light -- seriously!! I have been browsing them for months now trying to find a good deal...but no luck so far. So of course I turned to my trusty blogger friends for some ideas and inspiration......enter these two lovely ladies:
They both had WONDERFUL projects -- and I totally "borrowed" their fabulous ideas and created something new. So go visit their blogs too and check out their projects:
Heather over at
Our Life in a Click did some incredible
solar light jars -- for only $6.00!

And at Pam's blog,
Gingerbread & Snowflakes she has a great tutorial on how to "tint" glass!
Visit her tutorial -- it's awesome. (I mentioned this last week on my
PB knockoff table lamp).
Okay, are you ready for the project!?!
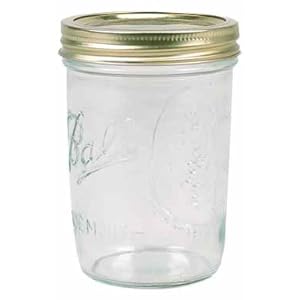
I picked up a box of wide mouth Mason jars (12 jars for $7.82).
And I already had my food coloring-Mod Podge technique down from my
last project like this. But just for some additional instructions (you get better each time you do it!) -- here's how I did it:
Pour about a 1/4 cup of
Outdoor Mod Podge onto a plastic plate and add 5 - 7 drops (depending on how light or dark you want your color) of food coloring. I used
McCormick's Neon Food Coloring (except the yellow - which is from a plain old box of food coloring). BTW - this was MORE than enough of the mixture to cover three glass jars.
Mix it together with a paint brush until it's completely blended.
Then paint it on!
Let it sit for a minute or two.
Take a paper towel and crumple it up. Dip it into the Mod Podge mixture and stipple the jar until you get the desired look.


If anyone else is a "messy crafter" like I am -- here's a tip: I took an old Crystal Light container and put the jar on top of it. That way I could hold the end of the container while I kept my hands free and clear of the Mod Podge mixture that was being slathered on my jars.
And don't be frightened if your jars look like this initially:
Hello Electric Green! They do mellow out as they dry to look more like this:

Now that the jars are done -- time to add some light!
I picked up these little solar lights at Menards for $2.00 a piece (still wish I would have bought more!)
Then I took the post and clear plastic off -- leaving just the solar top and light.

These lights sit perfectly in the tops of the jars -- they are pretty snug, but hold the light up:
Next step is to wrap some wire around the lip of the jar to hang them from a hook. I'm thinking you might able to use some sort of twine too? Just a thought.
I wrapped my wire around a few times and hooked them around each other so that each side had an end of the wire. Then I twirled them together in the middle to make a handle. (Make sure your wire is wrapped really tight around the glass).
The last step is to hang them on a hook. I searched high and low for some sort of shepherd's hook that didn't cost an arm and a leg. I found
these online, but I'm a "results-now" kind of girl -- so I didn't want to wait for them to shipped. I did happen upon these 18"
plant prop rods at Home Depot though. And for $.74 a pop -- I took twelve!
Simply hook the wire around the loop and you're ready for some night-time light from your colored jars!
Aren't they cute? I'm in love with these! But what's even better is the price:
MATERIALS:
12 pack of wide mouth jars: $7.82
12 solar lights at $2.00 each: $24.00
Wire: Had
Mod Podge: Had
Food Coloring: Had
12 Plant Prop Rods at $.74 each: $8.88
GRAND TOTAL: $40.70 which means just $3.39 PER LIGHT
Not bad!
And how 'bout a peak at night?
(luckily my talented hubby knows how to take better pictures at night than I do!)
UPDATE:
So I have gotten an enormous amount of emails from all the lovely bloggers out in the blogosphere who have had some questions about the Mod Podge Solar Lights -- and I wanted to post a little update to my instructions.
1. What kind of jars did you use?
I found mine at Menards for $7.00ish -- but if anyone lives by a Fleet Farm, I would try there too.
2. What kind of solar lights did you use?
This is kind of hard -- I bought
these lights from Menards. BUT - you don't have to do EXACTLY as I did -- you could use a bigger light and have it sitting on top of the jar -- just leave the plastic case thing on the light so it helps the light stay the jar:
3. Where do you get outdoor Mod Podge?
If YOU find out - let me know! It's something you may have to order online -- I couldn't find it in any stores. I know Joanne's website has it, but their store didn't. So -- check around online -- you can probably get it cheaper than in the store too. Oh - and sadly there are no Hobby Lobby's around me -- but I'm sure they have it.
Feel free to comment or email with any other questions -- I'll do my best to answer -- but I'm no expert!!
If anyone makes these lights -- let me know -- I'd love to show them off on here!


