Showing posts with label Mod Podge. Show all posts

Monday, October 25, 2010

Thanksgiving Nested Boxes

While we were on vacation I got to visit lots of cute, unique little stores filled with lots of Thanksgiving and Christmas decorations -- yes, Christmas.   And while I was so inspired by seeing all the beautiful decor for Christmas; Thanksgiving does come first -- so I focused my boutique-shopping-inspiration on a cute little Thanksigivng project.  I was SO happy with how it turned out I just HAD to share with you guys!

Here's a list of the materials you'll need to get started:

Nested Paper Mache box set:  $3.65 (at Joanne's with a 50% off coupon)
Scrapbook Paper in Fall Colors and Patterns:  $1.20
Metal Book Plates:  $1.95
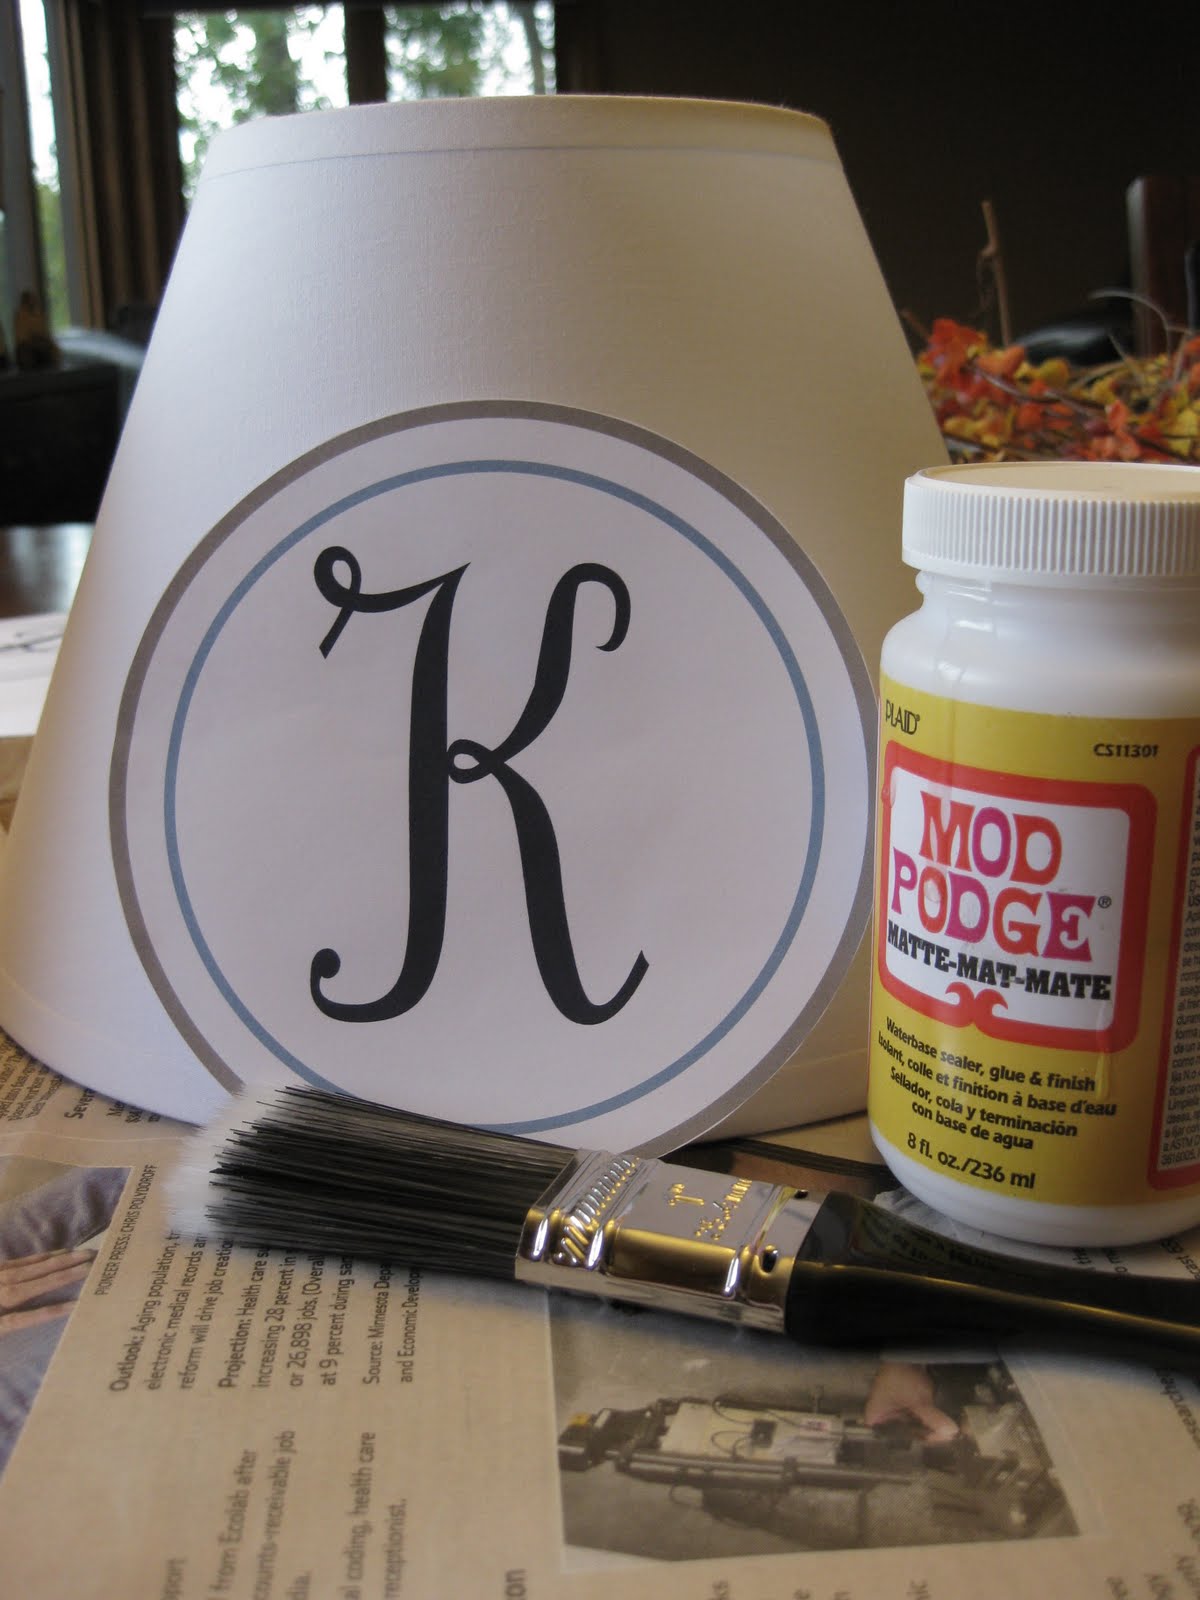
Mod Podge of your choosing
Paint Brush

Each box will get three different types of paper:  one for the top of the lid, one pattern for the side of the lid and one pattern for around the box.


Knowing that, you'll need to measure each box lid, lid side and side of base and cut your paper to those measured sizes.


Once you have everything cut paint some Mod Podge on the lid top and lay your paper on top of it.  Then go ahead and paint the Mod Podge over the paper.  Then let it dry while you Mod Podge the side of the base.


I found it was easiest to do the lid side last -- but I think you could do the paper adhering in any order.


Once the paper is on and dry, it's time to add the book plates with the Thanksgiving words of your choosing. :)  I could only find silver book plates, but I just didn't like the look of them on my boxes -- I needed them to stand out a lot more.


So of course I spray painted them -- the solution to everything, right?!  I also had to bend them slightly so they matched the curve of the box.


Once the book plates were ready I attached them with some brads and inserted my printed words.


The boxes are done!  Now stack them up....


 and maybe add some ribbon to the top.


With Thanksgiving around the corner I think these cute little boxes are just the decorations I needed!

 
Linking up to:
Mondays:Between Naps on the Porch ; C.R.A.F.T; Craft-O-Maniac; Keeping it Simple; Mad in Crafts; Making the World Cuter; The DIY Showoff; The Girl Creative Tuesdays:  All Thingz Related; House of Grace; I'm Topsy Turvy; Lucky Star Lane; Sugar Bee Craft Edition; The CSI Project; These Creative Juices; Today's Creative Blog Wednesdays:  Blue Cricket Design; Creations by Kara; Debbiedoos; Domestically Speaking; My Backyard Eden; Night Owl Crafting; Seven Thirty Three; Someday Crafts; The Thrifty Home; Trendy Treehouse Thursdays: Beyond the Picket Fence; Craftastical!; Fireflies & Jellybeans; House of Hepworths; Life as Lori; Somewhat Simple; The Shabby Chic Cottage Fridays:  Chic on a Shoestring; Finding Fabulous; Fingerprints on the Fridge; Frou Frou Decor; Frugal & Fabulous Design; It's a Hodge Podge Life; It's Fun to Craft!: Just a Girl; Remodelaholic; Simply Designing; The Shabby Nest; Tatertots & Jello Weekend:  A  Little Lovely; Be Different Act Normal; Funky Junk Interiors; House of Thrifty Decor; I Heart Naptime; Kuzak's Closet; Under the Table & Dreaming

Thursday, October 21, 2010

Rustic Photo Board Display


Well I FINALLY have a project to share with you today.  This is a little something I put together a while ago -- so I haven't actually DONE any sort of home improvement/crafty project in like THREE weeks.  Seriously.  I walked into Joanne's last night and I was there for over an hour -- as if I had never been in a craft store before.  I was finding all kinds of things to make and craft.  I'm sure I looked a little on the nuts-o side.   But I was feeling some withdrawal after being on vacation!

But enough of that -- let's get to this long-overdue project!  

A few months ago we went on a our annual family vacation to a lake up north, where my very talented hubby took this picture:


It's turned into one of my absolute favorite pictures -- it's so beautifully framed and the colors are just perfect.  Like I said, I have a talented hubby!

I wanted to frame this picture, but I didn't want to just throw it in any old frame -- it's a special picture and I wanted to do something special to it.  So I decided to make a distressed photo board. 

I started out with a 16 x 20 print of my photograph (which cost me about $17.00 -- but I'm sure you could find a better deal if you looked around for coupons and online shopping codes).  I also used a pallet that we had in our garage from a Menard's Delivery earlier in the summer.


Now comes a little bit of math -- I cut my boards to be 16" long (the same height as my photo I ordered).  I decided to cut five boards to stack across and left an equal amount of spacing between them to be a little more rustic looking.
I laid all my boards out on a flat surface and used a strait edge to keep them even while I used a screw as a spacer to equally space all my boards (real technical, I know).  Then I took another board and laid it across all my boards and nailed it in place -- this is to keep my measured 16" boards in place.


So when I was all done assembling my boards it looks something like this:


Now comes the fun part -- adding the photo.  I used Mod Podge (of course!  Would I really use anything else!?!)  and attached the back of the photo to the boards, and then I went over the top.  Don't worry about the edges really laying flat -- we'll fix that later.
Once it was Mod Podged on (and not fully dry) I took the end of a paint brush and scored my picture where the gaps in my boards are.  A word of warning though -- be careful that you don't scratch the picture when you are scoring -- just a light scare should do the trick.

Let the Mod Podge dry, and you should have something like this.  I originally planned on stopping here, but I just didn't like it.  It needed a little something more.  


 It needed to be more rustic.  And what doesn't say rustic like distressing?  

I ripped my photo around the edges to give it a more natural feel.  I didn't worry too much about keeping the edges strait since I wanted it to look unintentional.  

Then I took a clothe and my favorite dark walnut stain and rubbed it along the edges of my photo, the edges of the boards and then along the sides of the boards. 


NOW it feels finished.  I'm not sure where to hang it yet; but I'm thinking MAYBE in our newly refinished sun room.   You could do this with any picture you wanted to though  -- it's a fun way to make a special picture stand out from the rest.


Linking up to:
Mondays:Between Naps on the Porch ; C.R.A.F.T; Craft-O-Maniac; Keeping it Simple; Mad in Crafts; Making the World Cuter; The DIY Showoff; The Girl Creative Tuesdays:  All Thingz Related; House of Grace; I'm Topsy Turvy; Lucky Star Lane; Sugar Bee Craft Edition; The CSI Project; These Creative Juices; Today's Creative Blog Wednesdays:  Blue Cricket Design; Creations by Kara; Debbiedoos; Domestically Speaking; My Backyard Eden; Night Owl Crafting; Seven Thirty Three; Someday Crafts; The Thrifty Home; Trendy Treehouse Thursdays: Beyond the Picket Fence; Craftastical!; Fireflies & Jellybeans; House of Hepworths; Life as Lori; Somewhat Simple; The Shabby Chic Cottage Fridays:  Chic on a Shoestring; Finding Fabulous; Fingerprints on the Fridge; Frou Frou Decor; Frugal & Fabulous Design; It's a Hodge Podge Life; It's Fun to Craft!: Just a Girl; Remodelaholic; Simply Designing; The Shabby Nest; Tatertots & Jello Weekend:  A  Little Lovely; Be Different Act Normal; Funky Junk Interiors; House of Thrifty Decor; I Heart Naptime; Kuzak's Closet; Under the Table & Dreaming

Tuesday, September 28, 2010

Raffia Mod Podge Vase


Well as the temps and leaves keep dropping -- it's feeling more and more like fall here.  So you know that that means.....more fall decor! :)

Remember that raffia wreath I put together a few weeks ago?  I had plenty of raffia left over for it and I wanted to use it for another project.  This time around I thought I might make a raffia vase.  

So, here's what you'll need to make your raffia vase:


- Raffia (I used multicolored)
- Mason Jar (I used pint sized)
- Mod Podge (I used the glossy kind)
- Paint Brush
- Ribbon
- Dollar Store Flowers


First I painted Mod Podge on the outside of my jar.


Now comes the messy part.  Wrap a few pieces of raffia around the the jar and Mod Podge over them.  You have to hold them down for a few seconds so the ends of the raffia don't pop back up.  You'll get your fingers really Mod Podged for this part. :)  


I continued doing this around the mason jar.  I tried to overlap the ends to help hold them in place.

Once I had the whole jar covered I let it dry overnight.  If you're in a pinch or something you can always take a hair dryer to your vase -- it will accelerate the Mod Podge drying time.  (I know it looks scary now -- but it'll turn out -- I promise!)


See, it looks MUCH better now that it's dried.  Once I had my vase I put a ribbon on top and filled it with some dollar store flowers.


VIOLA!  A cute little fall flower jar!


I just could not help snapping a picture of my new vase with some of our pretty fall trees in the background. :)


Linking up to:
Mondays:Between Naps on the Porch ; C.R.A.F.T; Craft-O-Maniac; Keeping it Simple; Mad in Crafts; Making the World Cuter; The DIY Showoff; The Girl Creative Tuesdays:  All Thingz Related; House of Grace; I'm Topsy Turvy; Lucky Star Lane; Sugar Bee Craft Edition; The CSI Project; These Creative Juices; Today's Creative Blog Wednesdays:  Blue Cricket Design; Creations by Kara; Debbiedoos; Domestically Speaking; My Backyard Eden; Night Owl Crafting; Seven Thirty Three; Someday Crafts; The Thrifty Home; Trendy Treehouse Thursdays: Beyond the Picket Fence; Craftastical!; Fireflies & Jellybeans; House of Hepworths; Life as Lori; Somewhat Simple; The Shabby Chic Cottage Fridays:  Chic on a Shoestring; Finding Fabulous; Fingerprints on the Fridge; Frou Frou Decor; Frugal & Fabulous Design; It's a Hodge Podge Life; It's Fun to Craft!: Just a Girl; Remodelaholic; Simply Designing; The Shabby Nest; Tatertots & Jello Weekend:  A  Little Lovely; Be Different Act Normal; Funky Junk Interiors; House of Thrifty Decor; I Heart Naptime; Kuzak's Closet; Under the Table & Dreaming

Monday, September 6, 2010

Monogrammed Light Shade (plus a monogram print for you)!


So I'm sure you've kind of noticed that I'm over my love for beige and brown.  All I want to do is bring in the light and bright.  I recently got my hubby on board with me .... and he surprised me with a new bedding set!  And to make it better it was one that I had been eying at Target for quite sometime (don't worry it was on a major sale and we had a 10% off coupon).  Isn't he sweet!?! Maybe I'm biased. :)

Well since we got our new bright and beautiful comforter and  pillows, I realized that our bedside lamps really didn't go anymore.  They were from my "brown and beige period".


I'm sure you can guess why they're outside, right??!?  SPRAY PAINT! :)  I put bags of the light socket and switch part because I didn't want to get paint on those.  I used a Valspar metalic paint this time.


Now to the fun part....the monogram lamp shade.

 
Here's what you will need make your own monogrammed lamp shade:


- Printed Out Monogram
- Mod Podge
- Paint Brush
- Lamp Shade

I totally wish I had thought of doing a fun border on the inside ring before I had Mod Podged my print-offs on.  But once my monograms were on I didn't want to peel them off and start over.  Buuuuut, I did make some monograms with a foliage border on the middle circle....JUST FOR YOU! :)  


I cut out the monograms and Mod Podged them onto my lamp shades.   

I will note that my printer ink bleeds when it gets wet, so I put on a VERY thing layer of the Mod Podge ON THE BACK of the monogram.  I didn't put any Mod Podge over the top because I didn't want it to smear all over the place.

And here are my new bright lamps:


Do you LOVE them!?!  I think they really "go" with our new look.  And here they are in their new home:

Linking up to:
Mondays:Between Naps on the Porch ; C.R.A.F.T; Craft-O-Maniac; Keeping it Simple; Mad in Crafts; Making the World Cuter; The DIY Showoff; The Girl Creative Tuesdays:  All Thingz Related; House of Grace; I'm Topsy Turvy; Lucky Star Lane; Sugar Bee Craft Edition; The CSI Project; These Creative Juices; Today's Creative Blog Wednesdays:  Blue Cricket Design; Creations by Kara; Debbiedoos; Domestically Speaking; My Backyard Eden; Night Owl Crafting; Seven Thirty Three; Someday Crafts; The Thrifty Home; Trendy Treehouse Thursdays: Beyond the Picket Fence; Craftastical!; Fireflies & Jellybeans; House of Hepworths; Life as Lori; Somewhat Simple; The Shabby Chic Cottage Fridays:  Chic on a Shoestring; Finding Fabulous; Fingerprints on the Fridge; Frou Frou Decor; Frugal & Fabulous Design; It's a Hodge Podge Life; It's Fun to Craft!: Just a Girl; Remodelaholic; Simply Designing; The Shabby Nest; Tatertots & Jello Weekend:  A  Little Lovely; Be Different Act Normal; Funky Junk Interiors; House of Thrifty Decor; I Heart Naptime; Kuzak's Closet; Under the Table & Dreaming


Friday, August 20, 2010

Recycled Picture Frame

A few weeks ago while I was at HomeGoods I saw these adorable little magazine picture frames -- they were so cute!  And as much as I loved them and HAD to have them, I just couldn't overlook that $14.99 price tag.  It definitely wasn't a NEED -- so I sadly left without them.  But don't worry-- I'm a problem solver, so I came up with a way to make my own -- so here's the how-to for you thrifty, do-it-yourself, blog-loving gals. :)

First I went to the Dollar Tree and got a two pack of 4x6 frames for $1.00.  

Then I grabbed a stash of old magazines that I hadn't thrown away yet.  (I think I've mentioned before that I have a slight problem throwing things away)

I cut out a good variety of text only pages, colorful ads, and a mix of both.  


 Then I grabbed a handful of skinny drinking straws (not the extra fat ones like McDonald's gives out).


And here's where the project begins .....


 I glued each straw to the BACK of the magazine page I wanted to use.  And here's a tip for you -- you don't have to use the whole page -- and actually I would recommend using a piece of the page.  You aren't going to roll up a lot of paper -- just a little bit.  Now, LET THE GLUE DRY!  Be patient and just make sure it's completely hardened before you decide to roll up the magazine page -- it makes it easier, believe me. :)  I tried the hard way first.


 Now roll up those magazine pages!  You can see above that I don't have a lot rolled up.  I only twisted the page about two times around the straw.  Now take your glue gun and glue the edge almost like you're sealing the roll together.  Wait for it to dry and then cut the excess paper off.


Now keep making rolls of magazine pages until your hands are numb.  No, just kidding. :)  I did these while we were watching TV, and it took no time at all.   It all depends on the size of your frame -- I did four straws per side -- so 16 straws.  You want to make sure they are really squished together so there's no frame showing through.


 Okay -- this is the toughest part.  I cut my straws at a 45 degree angle to make a nice "seam" in the corners -- but I've seen frames that do it differently -- so be creative and make it however you want. :)  And I'm sorry -- but I have no good tips for cutting your straws at a 45 degree angle.  I just used the trial and error method. Probably not the best advice to give -- but it worked for me. :)


I glued first straw on the outside and let it hang over the edge slightly.  Then I glued the remaining straws as close to each other as possible -- you want them to hang over the edge a little so you can't see the dollar store frame.  Even the corners should be squished together.


And once everything is glued on, take some high-luster Mod Podge and paint a light coat on the magazine rolls.  Let it dry, and you should have this:


Definitely not perfect  -- but for $.50, it's not too bad. :)  I'm going to try to make another one with the other frame, so hopefully by then I'll get down how to make a perfect magazine roll.

Linking up to:
Mondays:Between Naps on the Porch ; C.R.A.F.T; Craft-O-Maniac; Keeping it Simple; Mad in Crafts; Making the World Cuter; The DIY Showoff; The Girl Creative Tuesdays:  All Thingz Related; House of Grace; I'm Topsy Turvy; Lucky Star Lane; Sugar Bee Craft Edition; The CSI Project; These Creative Juices; Today's Creative Blog Wednesdays:  Blue Cricket Design; Creations by Kara; Debbiedoos; Domestically Speaking; My Backyard Eden; Night Owl Crafting; Seven Thirty Three; Someday Crafts; The Thrifty Home; Trendy Treehouse Thursdays: Beyond the Picket Fence; Craftastical!; Fireflies & Jellybeans; House of Hepworths; Life as Lori; Somewhat Simple; The Shabby Chic Cottage Fridays:  Chic on a Shoestring; Finding Fabulous; Fingerprints on the Fridge; Frou Frou Decor; Frugal & Fabulous Design; It's a Hodge Podge Life; It's Fun to Craft!: Just a Girl; Remodelaholic; Simply Designing; The Shabby Nest; Tatertots & Jello Weekend:  A  Little Lovely; Be Different Act Normal; Funky Junk Interiors; House of Thrifty Decor; I Heart Naptime; Kuzak's Closet; Under the Table & Dreaming


Related Posts with Thumbnails