Showing posts with label spray paint. Show all posts

Tuesday, January 25, 2011

More Outdoor Winter Decorations

Okay, so I have another fun outside wintery-looking project for you gals today.  I actually did this project for Christmas, but decided to leave it up longer because it's not too Christmasy (like my wreath).


First, I found these shiny gold vases at Target on clearance for a mere $6.49 each.  Woo Hoo!  You absolutely cannot beat that price.  I had some ideas for these vases -- not that I don't love some brassy gold vases for my front door -- I just though a silvery tint would be a little more seasonal. :)


So I first primed these lovelies;


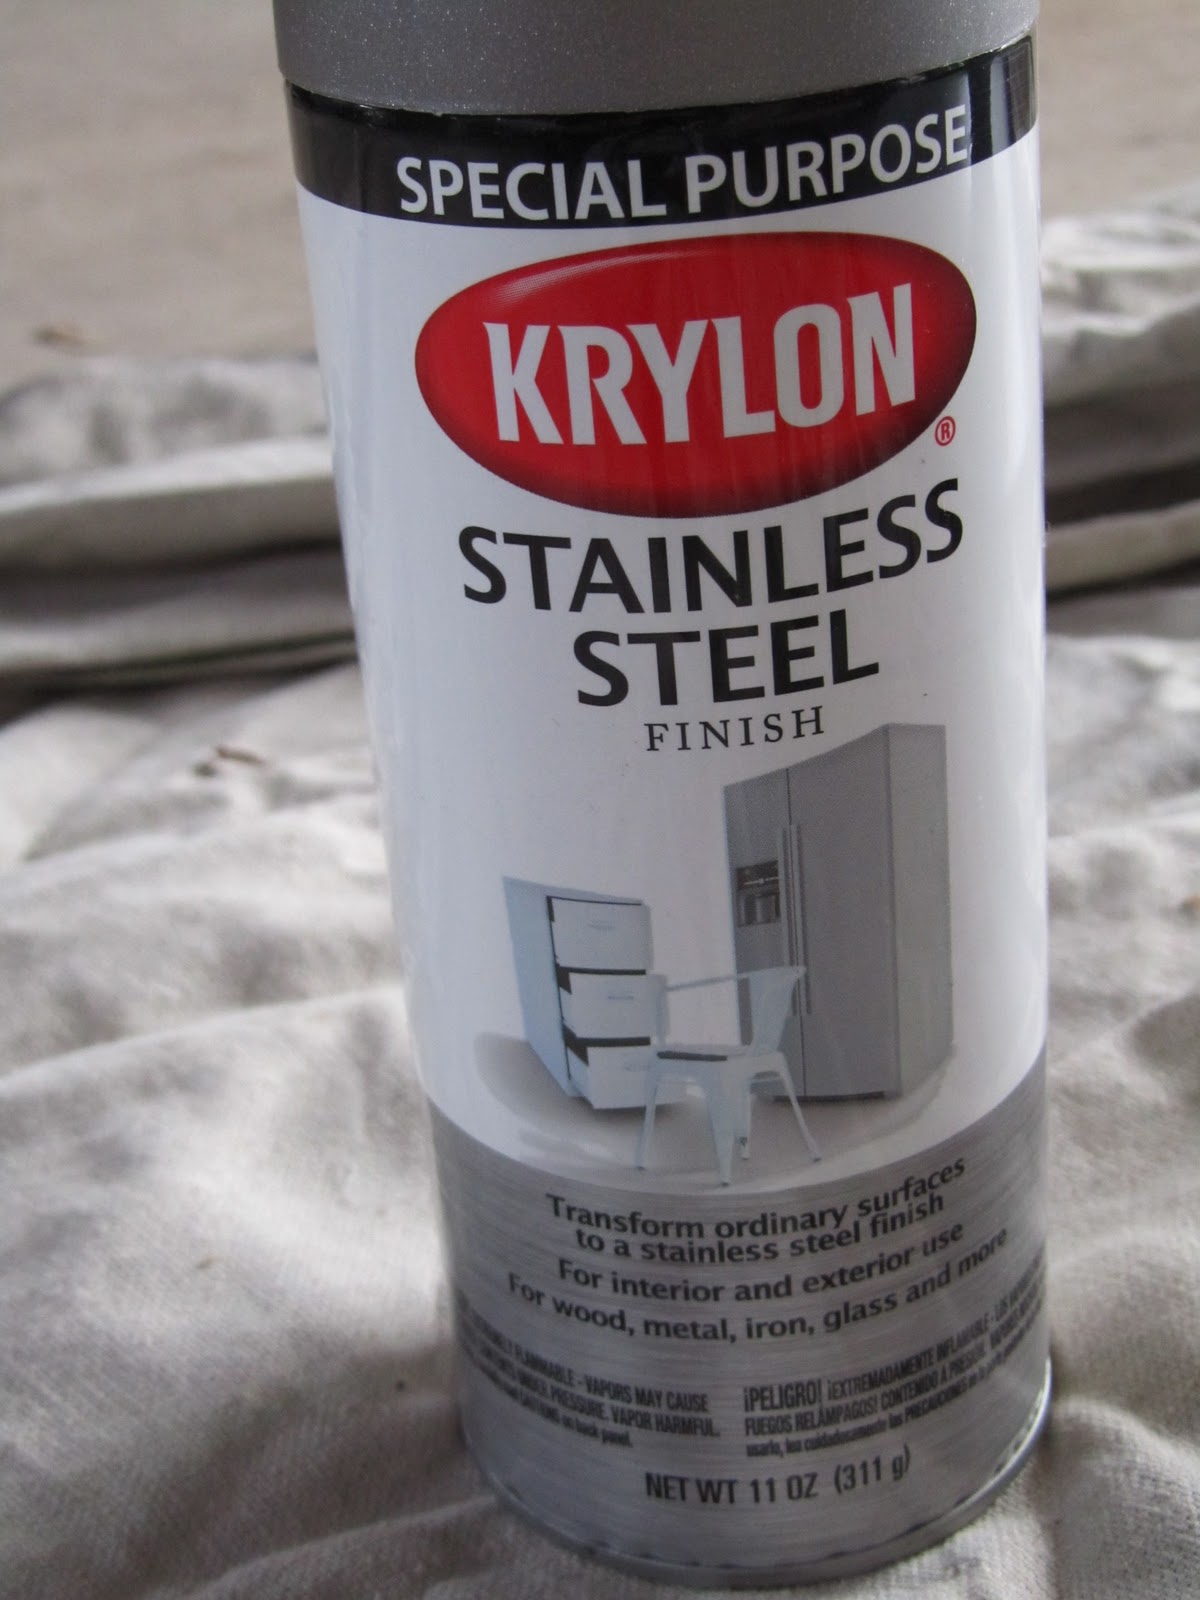
then I painted them with some of my brand new Krylon Stainless Steel spray paint.  This stuff is AWESOME you guys -- I got it from Krylon to try out and BOY do I love this finish!  It didn't run or get puddled like some spray paints do -- so it gets and A+ in my book!


I also found some branches around our property that were tall and had lots of little "fingers" on them.  I painted these with some white spray paint (is there anything that doesn't look good coated in a white paint!?!)  I did quite a few coats of this stuff just to make sure I could use them again next year without them getting all chippy.


I wanted some red berry-type objects to put on the ends of some of my cute white branches.  


And I happened to find these wooden "beads" that I chose to cover in a layer of dark red spray paint.
 

What do you think of those?  Ready to see them on my white branches??


And finally, I added some pine tree branches to my white-berry branches and placed them in my vases outside my door.  I LOVE these!  Unfortunately our driveway apron is a bit slanty so my larger vase was tipping over at first.  But then enter our ridiculous amount of snow and I was able to prop it up with it.


It kind of goes with my wreath from last week, don't you think??


Linking up to:
Mondays:Between Naps on the Porch ; C.R.A.F.T; Craft-O-Maniac; Keeping it Simple; Mad in Crafts; Making the World Cuter; The DIY Showoff; The Girl Creative Tuesdays:  All Thingz Related; House of Grace; I'm Topsy Turvy; Lucky Star Lane; Sugar Bee Craft Edition; The CSI Project; These Creative Juices; Today's Creative Blog Wednesdays:  Blue Cricket Design; Creations by Kara; Debbiedoos; Domestically Speaking; My Backyard Eden; Night Owl Crafting; Seven Thirty Three; Someday Crafts; The Thrifty Home; Trendy Treehouse Thursdays: Beyond the Picket Fence; Craftastical!; Fireflies & Jellybeans; House of Hepworths; Life as Lori; Somewhat Simple; The Shabby Chic Cottage Fridays:  Chic on a Shoestring; Finding Fabulous; Fingerprints on the Fridge; Frou Frou Decor; Frugal & Fabulous Design; It's a Hodge Podge Life; It's Fun to Craft!: Just a Girl; Remodelaholic; Simply Designing; The Shabby Nest; Tatertots & Jello Weekend:  A  Little Lovely; Be Different Act Normal; Funky Junk Interiors; House of Thrifty Decor; I Heart Naptime; Kuzak's Closet; Under the Table & Dreaming

Tuesday, January 18, 2011

Winter Wreath

First, thank you SO much for all your super-sweet comments after my last post -- it was such a nice welcome back! :)

So waaaaay back before Christmas even, I made a winter wreath for our front door.  And although I wish I didn't have to have a winter wreath up in January in February, we do live in Minnesota, and it is definitely still winter here.  Brrrrr!  Not to mention, we've had more snow this year than I've ever experienced in my whole life -- so yes, the winter wreath will be staying up for a few more months. 

This wreath is SO fun, and SO easy (and cheap) -- you know, my favorite things!

First, I found this wreath at Goodwill for only $.99.  I liked the twisted viney branches for my base -- and just took off the "Christmasy" decorations on the front.  I decided to paint it white for a bit of winter elegance. 


I gave it a few coats of white spray paint  -- oh yes, this was definitely painted quite some time ago -- with our below zero temperatures there is just no spray painting right now :(  


The next thing I did was spray paint some big pine cones. First I primed them so the paint would stay on through the cooold, coooold, months.  I chose a metallic blue for these pinecones -- another fun wintery color. :)


Soooo shimmery!  I love it -- the color just screams winter, right!?!

Next I glued three pine cones onto the front of the wreath with some trusty Gorilla Glue.


Finally, I found a pretty brown ribbon in my stash and tied it onto the front to hang it on the door:


I hung it on the door -- and viola!

I was pleasantly surprised at how easy and cute this wreath was!  I think it turned out pretty glammy from where it started, don't you think?

And the absolute BEST part was that I only spent $.99 on the actual wreath!  (Although I did splurge on the blue paint which was $3.29 -- still okay though, right!?!)


Linking up to:
Mondays:Between Naps on the Porch ; C.R.A.F.T; Craft-O-Maniac; Keeping it Simple; Mad in Crafts; Making the World Cuter; The DIY Showoff; The Girl Creative Tuesdays:  All Thingz Related; House of Grace; I'm Topsy Turvy; Lucky Star Lane; Sugar Bee Craft Edition; The CSI Project; These Creative Juices; Today's Creative Blog Wednesdays:  Blue Cricket Design; Creations by Kara; Debbiedoos; Domestically Speaking; My Backyard Eden; Night Owl Crafting; Seven Thirty Three; Someday Crafts; The Thrifty Home; Trendy Treehouse Thursdays: Beyond the Picket Fence; Craftastical!; Fireflies & Jellybeans; House of Hepworths; Life as Lori; Somewhat Simple; The Shabby Chic Cottage Fridays:  Chic on a Shoestring; Finding Fabulous; Fingerprints on the Fridge; Frou Frou Decor; Frugal & Fabulous Design; It's a Hodge Podge Life; It's Fun to Craft!: Just a Girl; Remodelaholic; Simply Designing; The Shabby Nest; Tatertots & Jello Weekend:  A  Little Lovely; Be Different Act Normal; Funky Junk Interiors; House of Thrifty Decor; I Heart Naptime; Kuzak's Closet; Under the Table & Dreaming

Thursday, September 16, 2010

Fall Candlestick Topiaries

Time for more fall crafts! :)  Speaking of fall -- don't forget -- today is the last date to enter Ramble Shamble's fall earrings giveaway!

Well you all know how much I LOVE a cheap and easy, crafty project -- and that's JUST what today is. I saw this idea at a store somewhere -- but of course, I can't remember where. Oh well -- just know it's not my idea. :)

I found this set of candlesticks at the thrift store for $2.99 each:


I cleaned them off, took my trusty can of spray paint and gave them a few shiny coats. :)  I used the same paint here as I did on my night table lamps.  I made it super easy on myself and painted the candlesticks and lamps at the same time.  Not that I don't LOVE to spray paint -- but the easier the better, right!? :)


The second step was to take some fall floral leaves and put them in the candle holder.  I used some that I happened to find at the thrift store for $.99 -- but you KNOW the Dollar Store has TONS of cute fall leaves, too -- they're all over the place!

I wrapped several ends together and bound them with a rubber-band.  Then I put them into the candle holder and put little pieces of newspaper around them to hold the leaves in place in the candle holder.


 What do you think???  I just can't say no to a quick and inexpensive project -- so I think they're pretty cute. :) 


Linking up to:
Mondays:Between Naps on the Porch ; C.R.A.F.T; Craft-O-Maniac; Keeping it Simple; Mad in Crafts; Making the World Cuter; The DIY Showoff; The Girl Creative Tuesdays:  All Thingz Related; House of Grace; I'm Topsy Turvy; Lucky Star Lane; Sugar Bee Craft Edition; The CSI Project; These Creative Juices; Today's Creative Blog Wednesdays:  Blue Cricket Design; Creations by Kara; Debbiedoos; Domestically Speaking; My Backyard Eden; Night Owl Crafting; Seven Thirty Three; Someday Crafts; The Thrifty Home; Trendy Treehouse Thursdays: Beyond the Picket Fence; Craftastical!; Fireflies & Jellybeans; House of Hepworths; Life as Lori; Somewhat Simple; The Shabby Chic Cottage Fridays:  Chic on a Shoestring; Finding Fabulous; Fingerprints on the Fridge; Frou Frou Decor; Frugal & Fabulous Design; It's a Hodge Podge Life; It's Fun to Craft!: Just a Girl; Remodelaholic; Simply Designing; The Shabby Nest; Tatertots & Jello Weekend:  A  Little Lovely; Be Different Act Normal; Funky Junk Interiors; House of Thrifty Decor; I Heart Naptime; Kuzak's Closet; Under the Table & Dreaming


Monday, September 6, 2010

Monogrammed Light Shade (plus a monogram print for you)!


So I'm sure you've kind of noticed that I'm over my love for beige and brown.  All I want to do is bring in the light and bright.  I recently got my hubby on board with me .... and he surprised me with a new bedding set!  And to make it better it was one that I had been eying at Target for quite sometime (don't worry it was on a major sale and we had a 10% off coupon).  Isn't he sweet!?! Maybe I'm biased. :)

Well since we got our new bright and beautiful comforter and  pillows, I realized that our bedside lamps really didn't go anymore.  They were from my "brown and beige period".


I'm sure you can guess why they're outside, right??!?  SPRAY PAINT! :)  I put bags of the light socket and switch part because I didn't want to get paint on those.  I used a Valspar metalic paint this time.


Now to the fun part....the monogram lamp shade.

 
Here's what you will need make your own monogrammed lamp shade:


- Printed Out Monogram
- Mod Podge
- Paint Brush
- Lamp Shade

I totally wish I had thought of doing a fun border on the inside ring before I had Mod Podged my print-offs on.  But once my monograms were on I didn't want to peel them off and start over.  Buuuuut, I did make some monograms with a foliage border on the middle circle....JUST FOR YOU! :)  


I cut out the monograms and Mod Podged them onto my lamp shades.   

I will note that my printer ink bleeds when it gets wet, so I put on a VERY thing layer of the Mod Podge ON THE BACK of the monogram.  I didn't put any Mod Podge over the top because I didn't want it to smear all over the place.

And here are my new bright lamps:


Do you LOVE them!?!  I think they really "go" with our new look.  And here they are in their new home:

Linking up to:
Mondays:Between Naps on the Porch ; C.R.A.F.T; Craft-O-Maniac; Keeping it Simple; Mad in Crafts; Making the World Cuter; The DIY Showoff; The Girl Creative Tuesdays:  All Thingz Related; House of Grace; I'm Topsy Turvy; Lucky Star Lane; Sugar Bee Craft Edition; The CSI Project; These Creative Juices; Today's Creative Blog Wednesdays:  Blue Cricket Design; Creations by Kara; Debbiedoos; Domestically Speaking; My Backyard Eden; Night Owl Crafting; Seven Thirty Three; Someday Crafts; The Thrifty Home; Trendy Treehouse Thursdays: Beyond the Picket Fence; Craftastical!; Fireflies & Jellybeans; House of Hepworths; Life as Lori; Somewhat Simple; The Shabby Chic Cottage Fridays:  Chic on a Shoestring; Finding Fabulous; Fingerprints on the Fridge; Frou Frou Decor; Frugal & Fabulous Design; It's a Hodge Podge Life; It's Fun to Craft!: Just a Girl; Remodelaholic; Simply Designing; The Shabby Nest; Tatertots & Jello Weekend:  A  Little Lovely; Be Different Act Normal; Funky Junk Interiors; House of Thrifty Decor; I Heart Naptime; Kuzak's Closet; Under the Table & Dreaming


Friday, September 3, 2010

Double Up!

Okay -- so I'm sure by now you're all getting sick of my bathroom redo -- but bear with me -- I've got one more little addition to that bright new space. :) (If you want to catch up on the bathroom projects, you can find them here, here and here).

I think you'll see where I'm going with this...but I had this huge empty wall behind the door -- and it was just SCREAMING for some attention to turn it into a real looker.


Oh sad, bare wall!  Well that's about to change -- because I found a plethora of unique, unwanted frames at the thrift store last week!


As you can see some of them need some serious color-changing!  I spray painted these soon-to-be beauties with Rustoleum Semi-Gloss White and let them dry.  

Next step was to take some of those decoupage letters you can find a a thrift store and spray paint those as well.  I chose Rustoleum metallic silver for the letters -- I wanted them to stand out from the frames.  (Sorry no pics -- it's pretty self-explanatory though!) :)

Ready to see my attention grabbing wall now!?


There you have it!  I chose to double up my frames since I didn't have a lot of space width-wise to work with.  I kind of like them better that way, since the frames that ended up being in the middles are actually duplicates.  And what do you think of the letters??  I was a little apprehensive about painting cardboard metallic -- but I think it makes them look pretty "metally".


Now I promise -- I'm almost done with showing you this teal, teal bathroom! :)

Linking up to:
Mondays:Between Naps on the Porch ; C.R.A.F.T; Craft-O-Maniac; Keeping it Simple; Mad in Crafts; Making the World Cuter; The DIY Showoff; The Girl Creative Tuesdays:  All Thingz Related; House of Grace; I'm Topsy Turvy; Lucky Star Lane; Sugar Bee Craft Edition; The CSI Project; These Creative Juices; Today's Creative Blog Wednesdays:  Blue Cricket Design; Creations by Kara; Debbiedoos; Domestically Speaking; My Backyard Eden; Night Owl Crafting; Seven Thirty Three; Someday Crafts; The Thrifty Home; Trendy Treehouse Thursdays: Beyond the Picket Fence; Craftastical!; Fireflies & Jellybeans; House of Hepworths; Life as Lori; Somewhat Simple; The Shabby Chic Cottage Fridays:  Chic on a Shoestring; Finding Fabulous; Fingerprints on the Fridge; Frou Frou Decor; Frugal & Fabulous Design; It's a Hodge Podge Life; It's Fun to Craft!: Just a Girl; Remodelaholic; Simply Designing; The Shabby Nest; Tatertots & Jello Weekend:  A  Little Lovely; Be Different Act Normal; Funky Junk Interiors; House of Thrifty Decor; I Heart Naptime; Kuzak's Closet; Under the Table & Dreaming


Have you entered the Village Boutique Giveaway yet!?! 

Wednesday, September 1, 2010

More Thrift Store Treasures

It's time for another thrift store makeover today. :)  I hope your not getting sick of these -- because I'm definitely not getting sick of going hunting at the thrift store!  A few weeks back I found this bronze beauty:


 Okay -- and the best part of this was I didn't actually pay $3.99 - I got it on the yellow tag sale day -- so it was a mere $2.50.  Can't beat that right!?!  So first, I decided to spray paint this little lovely semi-gloss black.  It turned out to be not exactly what I wanted .... so back to the can of spray paint I went.  The second time around I chose white.  MUCH BETTER!  :) 

If you ever find a tray like this and you want to paint it -- there are little pins in the sides that you pull out and that releases the mirror from the framed part.  Just don't lose the pins -- they're tiny! 

So here's what I ended up with:


I decided to fill it up with candles and seashells.  It goes perfectly in my new beachy bathroom!


Linking up to:
Mondays:Between Naps on the Porch ; C.R.A.F.T; Craft-O-Maniac; Keeping it Simple; Mad in Crafts; Making the World Cuter; The DIY Showoff; The Girl Creative Tuesdays:  All Thingz Related; House of Grace; I'm Topsy Turvy; Lucky Star Lane; Sugar Bee Craft Edition; The CSI Project; These Creative Juices; Today's Creative Blog Wednesdays:  Blue Cricket Design; Creations by Kara; Debbiedoos; Domestically Speaking; My Backyard Eden; Night Owl Crafting; Seven Thirty Three; Someday Crafts; The Thrifty Home; Trendy Treehouse Thursdays: Beyond the Picket Fence; Craftastical!; Fireflies & Jellybeans; House of Hepworths; Life as Lori; Somewhat Simple; The Shabby Chic Cottage Fridays:  Chic on a Shoestring; Finding Fabulous; Fingerprints on the Fridge; Frou Frou Decor; Frugal & Fabulous Design; It's a Hodge Podge Life; It's Fun to Craft!: Just a Girl; Remodelaholic; Simply Designing; The Shabby Nest; Tatertots & Jello Weekend:  A  Little Lovely; Be Different Act Normal; Funky Junk Interiors; House of Thrifty Decor; I Heart Naptime; Kuzak's Closet; Under the Table & Dreaming

  
Related Posts with Thumbnails